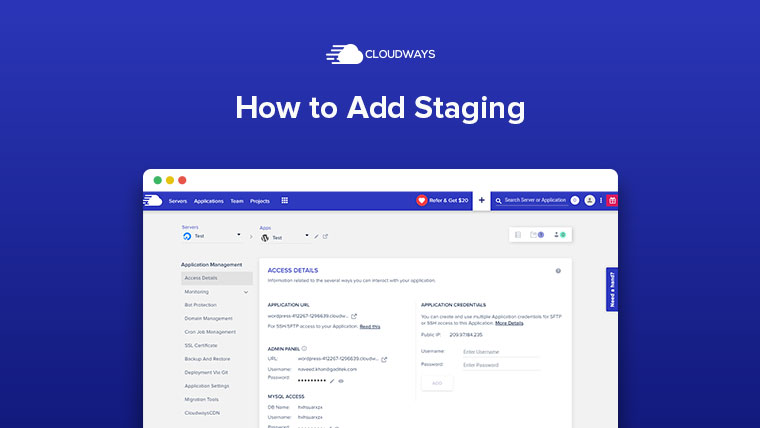
In this guide, we will show you the method of creating and setup staging sites in cloudways.
So Stay Tuned!!
Welcome to the world of hassle-free website updates and seamless testing with Cloudways staging!
If you’re a website owner, developer, or designer, you know the importance of ensuring your website is running smoothly and error-free.
Making changes to a live website can be risky, as it may result in downtime, errors, or other issues that can impact user experience and damage your online reputation.
In this blog post, we will dive into the ins and outs of Cloudways staging, including how to set it up, best practices for using it, and the benefits it offers for website owners and developers.
Whether you’re a seasoned website professional or just starting out, this comprehensive guide will provide you with valuable insights and practical tips on how to effectively leverage Cloudways staging to streamline your website development workflow and achieve a seamless website experience for your users.
So without wasting more time Let’s get started!
If you haven’t sign up on Cloudways.
Use our special Cloudways Promo Code to get $30 Credit.
You can use this $30 Credit to Create a Server and Host your Websites.
Sign up using this Promo Code WEBMT30, Verify your Phone and Email, then Upgrade your Account to avail of FREE $30 Cloudways Credit.
Let's Start!!
What is a Staging Site?
A staging site, also known as a staging environment or a development environment, is a duplicate or replica of a live website that is used for testing and making changes before implementing them on the live site.
It is a separate environment where website updates, improvements, and other changes can be thoroughly tested without affecting the live website.
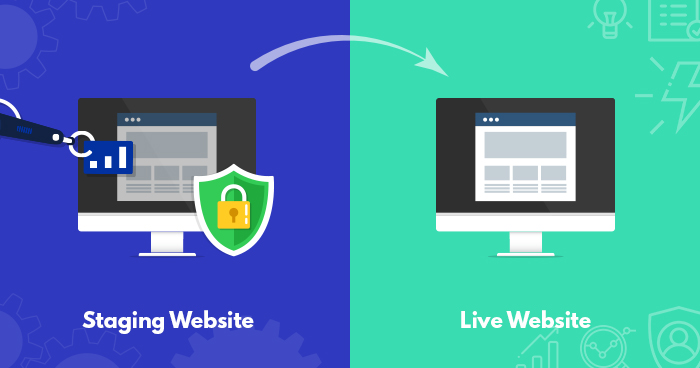
It allows website owners, developers, and designers to make changes, test new features, plugins, themes, or other updates, and fix any issues or bugs before implementing them on the live site.
This helps to minimize the risks of introducing errors, downtime, or other issues on the live site and ensures a smooth and error-free experience for users.
Staging sites are widely used in website development workflows to ensure that changes are thoroughly tested and validated before being applied to the live site.
They provide a sandbox-like environment where changes can be made and tested without impacting the live site’s performance or user experience.
What is Cloudways Staging Site?
Cloudways Staging Site is a feature offered by Cloudways, a managed cloud hosting platform, that allows users to create a separate duplicate environment of their live website for testing and making changes.
It provides a safe and controlled environment where website owners, developers, and designers can test updates, improvements, and other changes without affecting the live site.
Cloudways Staging Site is a powerful tool in the website development workflow that helps users to streamline the process of testing and implementing changes on their websites, ensuring a smooth and error-free experience for their users.
Get more details about Cloudways Hosting:
Step-by-Step Guide
Create and Setup Staging Sites in Cloudways
This Staging guide will cover the key steps and features of Cloudways Staging to help you effectively use this powerful tool in your website development workflow.
Creating a Staging Site in cloudways
The first step in using Cloudways Staging is to create a staging site. Here’s how you can do it:
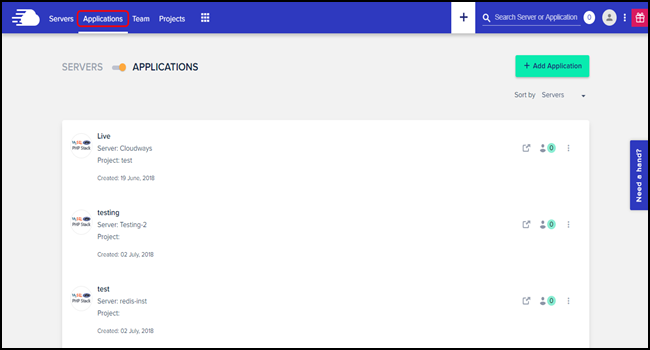
- Log in to your Cloudways account and select the desired server where your live site is hosted.
- Navigate to the “Applications” tab and select the application for which you want to create a staging site.
- On the application details page, click on the “Staging” tab.
- Click on the “Create Staging” button to create a new staging site.
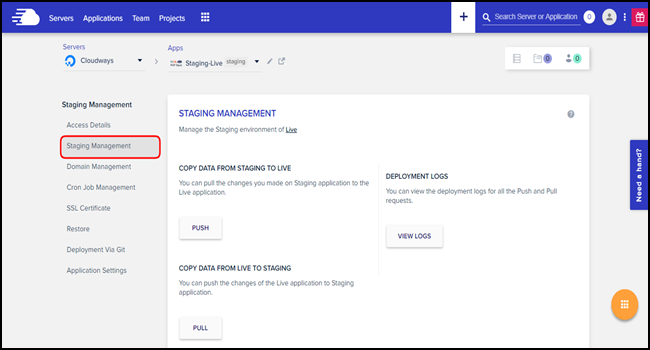
Cloudways will create a separate environment with the same configurations, settings, content, and design as your live site. It will also generate a unique staging URL that you can use to access the staging site.
Making Changes on the Staging Site
Once you have created a staging site, you can start making changes to test updates, improvements, or other changes.
Here are some key points to keep in mind:
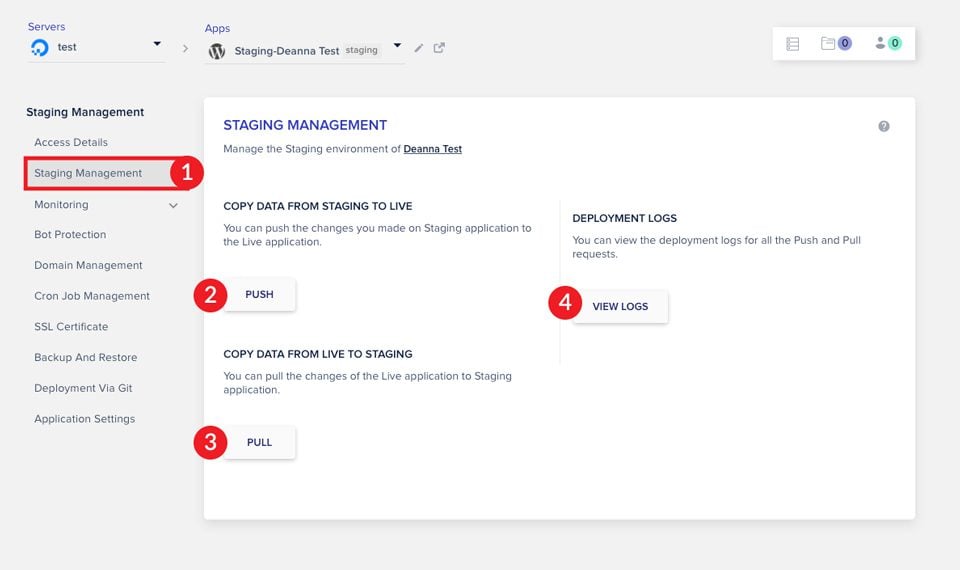
- Use the staging site as a sandbox environment: Treat the staging site as a sandbox environment where you can freely make changes without affecting the live site. You can test new features, plugins, themes, or other updates, and make changes to configurations, settings, content, and design.
- Thoroughly test changes: Test all changes thoroughly on the staging site to ensure that they work as expected and do not introduce any errors, issues, or conflicts. Validate the changes on different devices, browsers, and user scenarios to ensure their compatibility and functionality.
- Backup your staging site: It’s recommended to create a backup of your staging site before making any significant changes. This allows you to easily restore your staging site to a previous state if needed.
- Test performance and security: Use the staging site to test the performance and security of your website changes. Check the loading speed, security measures, and other performance metrics to ensure that the changes do not impact the website’s performance or security negatively.
Deploying Changes to the Live Site
Once you have thoroughly tested and validated the changes on the staging site, you can deploy them to the live site.
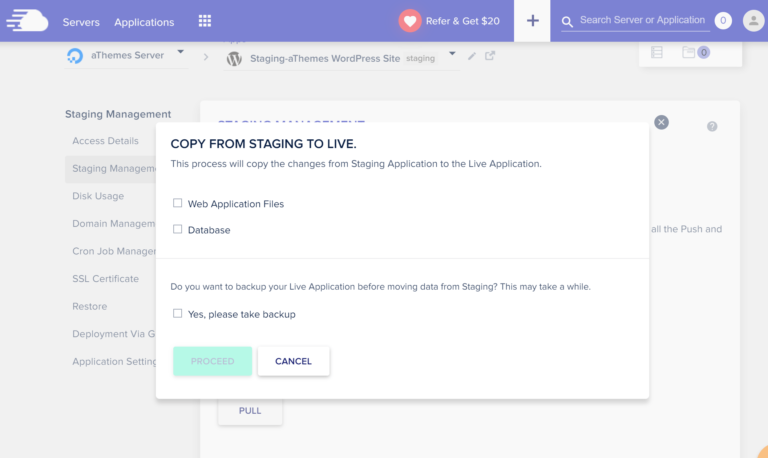
Here’s how you can do it:
- Create a backup of your live site: Before deploying changes to the live site, it’s recommended to create a backup of your live site to ensure that you can restore it to a previous state if needed.
- Sync changes from staging to live: In the Cloudways Staging tab, click on the “Sync Changes” button to sync the changes from the staging site to the live site. This will copy the changes you made on the staging site to the live site.
- Verify changes on the live site: Once the changes are synced, verify them on the live site to ensure that they are working as expected and have been successfully implemented.
Managing Multiple Staging Sites
Cloudways Staging allows you to create and manage multiple staging sites for different applications or websites.
Here are some key points to keep in mind:
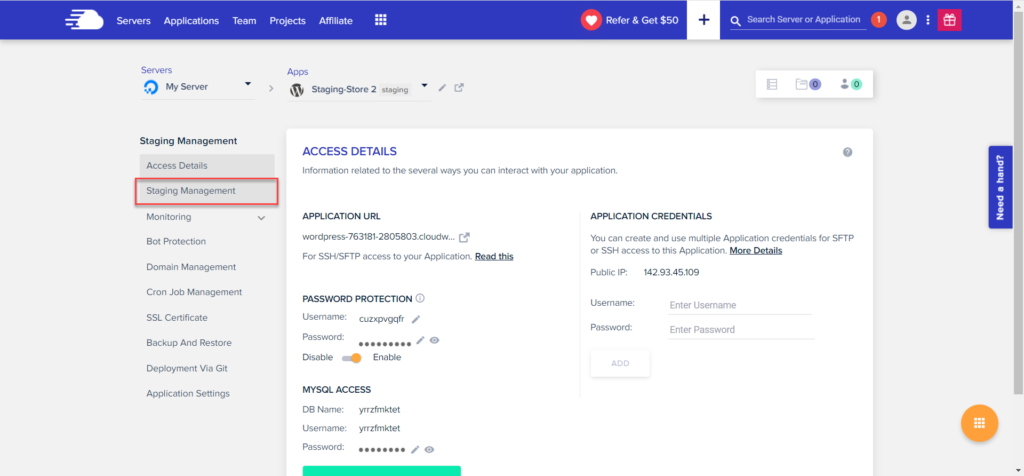
- Create separate staging sites for different websites: If you have multiple websites hosted on different applications on Cloudways, you can create separate staging sites for each website to test changes independently.
- Name your staging sites descriptively: You can use a consistent naming convention for your staging sites, such as adding a prefix or suffix to the site name or using specific keywords that indicate the purpose of the staging site.
Advantages you should need to know
Benefits of Cloudways Staging Sites
Cloudways Staging Sites offer several benefits for website owners, developers, and designers:
1. Safe and controlled testing environment:
Cloudways Staging Sites provide a separate environment where website changes can be thoroughly tested without affecting the live site.
This helps to minimize the risks of introducing errors, downtime, or other issues on the live site, ensuring a safe and controlled testing environment.
2. Accurate replication of live site:
Cloudways Staging Sites create an exact replica of the live site, including configurations, settings, content, and design. This allows for accurate testing and validation of changes, ensuring that they will work as expected on the live site.
3. Easy and user-friendly interface:
Cloudways Staging Sites offer a user-friendly interface that makes it easy to create, manage, and deploy changes to the staging site.
Users can easily create a staging site with a few clicks, make changes, test them, and then push the changes to the live site when they are ready.
4. Time and cost-effectiveness:
Cloudways Staging Sites help to save time and cost by allowing users to test changes in a separate environment before applying them to the live site.
This helps to avoid potential downtime, errors, or other issues on the live site, which can result in costly repairs or fixes.
5. Enhanced collaboration and team workflows:
Cloudways Staging Sites facilitate collaboration among teams by providing a separate environment where multiple team members can work on different changes simultaneously without affecting the live site. This helps to streamline team workflows and improve productivity.
6. Flexibility and Scalability:
Cloudways Staging Sites offer flexibility and scalability, allowing users to create and manage multiple staging sites for different websites. This makes it easy to test changes on multiple websites or different stages of website development.
7. Seamless deployment of changes:
Cloudways Staging Sites allow users to easily deploy changes from the staging site to the live site when they are ready. This ensures a smooth and error-free process of implementing changes on the live site.
Know the Potential-
Using Cloudways Staging Effectively
Using Cloudways Staging effectively involves following best practices and optimizing your workflow. Here are some tips for using Cloudways Staging effectively:
1. Always test changes on the staging site:
Before making changes to your live site, test them thoroughly on the staging site. This includes changes to themes, plugins, configurations, content, and design. This helps you identify and fix any issues or conflicts before deploying changes to your live site.
2. Keep your staging site up-to-date:
Keep your staging site in sync with your live site by regularly updating themes, plugins, and other software. This ensures that you are testing changes on an environment that accurately reflects your live site, reducing the risk of issues when deploying changes.
3. Use the staging site for major updates:
Use Cloudways Staging for major updates, such as major theme changes, plugin updates, or major content revisions. This allows you to thoroughly test these changes in isolation before applying them to your live site.
4. Collaborate effectively:
Cloudways Staging allows multiple team members to work on different changes simultaneously. Utilize this feature to collaborate effectively with your team, communicate about changes being tested, and keep track of progress.
5. Take backups:
Before deploying changes from the staging site to the live site, always take a backup of your live site. This serves as a safety net in case any issues arise during deployment.
6. Use a separate domain or subdomain:
Use a separate domain or subdomain for your staging site to avoid confusion with your live site. This makes it clear which environment you are working on and prevents accidental changes to the live site.
7. Monitor and track changes:
Monitor your staging site for any issues, errors, or conflicts. Keep track of changes made on the staging site, including theme/plugin updates, content revisions, and configurations. This helps you identify and fix issues before deploying changes to the live site.
Test different devices and browsers: Test your staging site on different devices, browsers, and operating systems to ensure that your changes are responsive and function properly across various platforms.
Final Verdict-
A Guide to Create Staging Sites on Cloudways
Cloudways Staging Environment is a powerful feature that allows you to create a separate, isolated copy of your live website for testing and development purposes.
With Cloudways Staging, you can make changes, updates, and test new features without affecting your live site, ensuring a stable and reliable website for your visitors.
It can greatly enhance your website workflow by providing a safe and isolated environment for testing, development, and experimentation.
It enables you to improve your website’s functionality, design, and performance without disrupting your live site, making it an invaluable tool for website owners, developers, and designers using the Cloudways hosting platform.
At the end of the post, we hope that this guide was informative for you. We just want to say that we have mentioned all the major steps and details that you need to know before staging sites.
Also checkout this:
Frequently Asked Questions
Why should I use Cloudways Staging?
Using Cloudways Staging has several benefits, including the ability to thoroughly test changes, updates, and new features before deploying them to your live site, reducing the risk of potential issues or downtime.
How do I access my Cloudways staging site?
Once your staging site is created, you will see the staging site details, including the staging domain, username, and password. You can use these credentials to access your staging site via FTP, SSH, or through the Cloudways File Manager, just like you would with your live site.
Can I have multiple staging sites on Cloudways?
Yes, you can create multiple staging sites on Cloudways for the same application. Each staging site will be separate and isolated, allowing you to test changes and updates separately before deploying them to your live site.
Is Cloudways Staging available on all hosting plans?
Cloudways Staging is available on selected hosting plans, depending on your Cloudways subscription. It is available on Cloudways plans that include the “Staging” feature, which may vary depending on the hosting provider and plan you have chosen.
Is there an additional cost for using Cloudways Staging?
Cloudways Staging is included as a feature in selected hosting plans.


